
pete_balkus
Members
-
Joined
-
Last visited
-
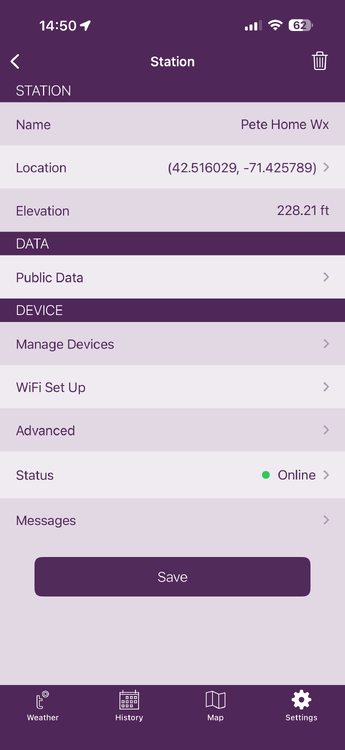
Tempest Wx Station Replacement Process Per a conversation with Tempest Customer Support, here is the procedure I used to easily and seamlessly replace my defective Tempest Wx Station with a new replacement unit. The new/replacement Tempest Wx Station is now providing full, correct data to my EISY R2. Pete The process of connecting the new Tempest Wx Station to my current Tempest Wi-Fi Hub was: 1. Unmount and turn off the old/defective Tempest Wx Station. Turn on the new Tempest Wx Station. The LED should eventually slowly blink green, indicating it is in pairing mode. If the LED does not stay blinking green, press and hold the LED button until it flashes to reset the device. 3. Open the Tempest App, go to Settings > Stations > (choose your station) > Manage Devices > (select the device you are replacing) > Advanced > Replace Device. 4. The new device ID will appear on screen. Choose the new device to finish connecting it. 5. The LED on the base of the Tempest Wx Station should flash green and then go out, indicating it has successfully paired to the Hub. 6. Check the Tempest app and verify that the current observation data is displayed. 7. Login to your EISY > Plugins > Launch Polyglot V3 Select Dashboard > Nodes > Restart 8. Verify that the Log data shows new data coming in from the Tempest Wx device 9. Verify that the EISY Weatherflow device displays data from the Tempest Wx device Note: Using the above procedure, the new Tempest Wx Device will retain the old device's name (which will be defaulted to the old serial number). This makes replacement seamless with no Plugin changes required…
-
Thank you for the response and information shared - appreciated. I understand that the IoX Plug-in does not require sharing the Wx Station data publicly; however, in my Wx Station use case, the Wx data has multiple uses, some of which require public data to be enabled. I also appreciate the suggestion and info you provided on configuring the EISY to access and use the replacement Wx Station. I will keep you posted... Pete
-
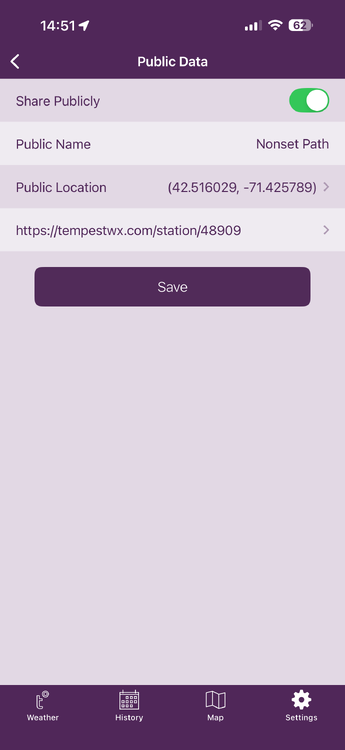
Update & Next Steps... Regarding station ID - I have Public Data enabled in my Wx Station Setup, so I can send/share my Wx Data to Weather Underground, and the Wx Station data is visible to anyone on the Web. If you look at the two Tempest App screenshots I included with the post, you will see the setup and that the new Station ID created by doing this is 48909. Wx Station Sensor Failure - I also contacted Tempest Support regarding the temperature and Humidity sensor data issue, and it appears that I have had an internal sensor failure. As a result, I have arranged with them to obtain a replacement Wx Station unit to collect this data. I will report back on the overall operation once I install and test the replacement Wx Station. Pete
-
Interesting - After letting things sit overnight (11:00 pm to 7:15 am) with no additional changes or restarts, I checked this morning and see that Wx Station data is now available, as shown in the table below. Unclear why things started working.... The new problem is that, for some strange reason, the Temp Data is negative?? Temp -48.98 Dewpoint -49.0 However, my iPhone App shows the same thing, so it appears to be a Station HW issue... Always something... Pete Name Driver UOM Value Variable Station Pressure ATMPRES 23 30.32 ${sys.node.n001_141178.ATMPRES} Sealevel Pressure BARPRES 23 30.071 ${sys.node.n001_141178.BARPRES} Battery BATLVL 72 2.639 ${sys.node.n001_141178.BATLVL} Humidity CLIHUM 22 99.37 ${sys.node.n001_141178.CLIHUM} Temperature CLITEMP 17 -48.98 ${sys.node.n001_141178.CLITEMP} Dewpoint DEWPT 17 -49.0 ${sys.node.n001_141178.DEWPT}
-
Thank you for responding - appreciated... I tried the following to check for Wx Date by doing the following: Open Polygot V3 Click on Dashboards Click on Nodes Click on Nodes Station parameters are listed, but values are all 0 as shown in the table below... I have tried both Local and Remote, and the same result... My station ID key (48909) was obtained from the following command: https://tempestwx.com/station/48909/ Any thoughts on where to go from here? Pete Node DetailsNode Name 1 Address NodeDef Primary Node Hint Enabled Is Primary Delete ST-00010151 141178 tempest controller 0x00000000 true false Name Driver UOM Value Variable Station Pressure ATMPRES 117 0 ${sys.node.n001_141178.ATMPRES} Sealevel Pressure BARPRES 117 0 ${sys.node.n001_141178.BARPRES} Battery BATLVL 72 0 ${sys.node.n001_141178.BATLVL} Humidity CLIHUM 22 0 ${sys.node.n001_141178.CLIHUM} Temperature CLITEMP 17 0
-
Having an issue when I have my Tempest Wx Station setup and showing connected in Ployglot 3x, but no data is populating in the EISY (6.0.4) Device display. WeatherFlow(1)Current Status: Connected Current Version: 3.0.32 / Standard [Production] The EISY has a CAT-6 network connection The Tempest wx Station is connected via Wi-Fi. However, both are on the same subnet 172.16.101.0 /24 Checking the WeatherFlow Log, I see the errors listed below... Not sure if these are preventing other data from being displayed on the EISY Any thoughts on how to investigate further or address? Pete 2026-03-15 17:12:03.076 Thread-6 (udp_data) udi_interface INFO derived:updateTrend: TREND 1021.470000 to 1021.5300002026-03-15 17:12:03.076 Thread-6 (udp_data) udi_interface INFO derived:updateTrend: TREND 1021.470000 to 1021.530000 2026-03-15 17:12:03.076 Thread-6 (udp_data) udi_interface INFO derived:updateTrend: TREND 1021.470000 to 1021.530000 2026-03-15 17:12:03.076 Thread-6 (udp_data) udi_interface INFO derived:updateTrend: TREND 1021.470000 to 1021.530000 2026-03-15 17:12:03.077 Thread-6 (udp_data) udi_interface ERROR tempest:update: Failure to calculate Air temps: unsupported operand type(s) for /: 'NoneType' and 'float' 2026-03-15 17:12:03.077 Thread-6 (udp_data) udi_interface ERROR tempest:update: Failure to calculate Air temps: unsupported operand type(s) for /: 'NoneType' and 'float' 2026-03-15 17:12:03.077 Thread-6 (udp_data) udi_interface ERROR tempest:update: Failure to calculate Air temps: unsupported operand type(s) for /: 'NoneType' and 'float' 2026-03-15 17:12:03.077 Thread-6 (udp_data) udi_interface ERROR tempest:update: Failure to calculate Air temps: unsupported operand type(s) for /: 'NoneType' and 'float' 2026-03-15 17:12:03.077 Thread-6 (udp_data) udi_interface ERROR weatherflow:udp_data: Failed to send data to ISY: unsupported operand type(s) for *: 'NoneType' and 'float' 2026-03-15 17:12:03.077 Thread-6 (udp_data) udi_interface ERROR weatherflow:udp_data: Failed to send data to ISY: unsupported operand type(s) for *: 'NoneType' and 'float' 2026-03-15 17:12:03.077 Thread-6 (udp_data) udi_interface ERROR weatherflow:udp_data: Failed to send data to ISY: unsupported operand type(s) for *: 'NoneType' and 'float' 2026-03-15 17:12:03.077 Thread-6 (udp_data) udi_interface ERROR weatherflow:udp_data: Failed to send data to ISY: unsupported operand type(s) for *: 'NoneType' and 'float' 2026-03-15 17:12:46.079 MQTT udi_interface.interface INFO interface:_message: Successfully set controller :: GV4 to 2 UOM 57 2026-03-15 17:12:46.079 MQTT udi_interface.interface INFO interface:_message: Successfully set controller :: GV4 to 2 UOM 57 2026-03-15 17:12:46.079 MQTT udi_interface.interface INFO interface:_message: Successfully set controller :: GV4 to 2 UOM 57 2026-03-15 17:12:46.079 MQTT udi_interface.interface INFO interface:_message: Successfully set controller :: GV4 to 2 UOM 57
-
Issue resolved by: 1: ISY9941 - Exclude Z-Wave Device Listening... 2: Lock Cmds Master Code # 7# 3# (Remove) 3: ISY994i - Add Z-Wave Device Listening... 4: Lock Cmds Master Code # 7# 1# (Add) Back up... Pete
-
I just updated my ISY994i to 4.2.2 SW and Z-wave FW 4.5.5. While I was able to re-add my Z-Wave Aeotec Range Extender to the ISY994i I can no longer get the ISY994i to see/talk with my Yale lock that is ~20ft from the ISY994i controller? Here is the procedure I am using: 1: On ISY994i UDA Console I Perform 1. Z-Wave --> Add a Z-Wave Device 2. Listening dialog box appears... 2: Procedure performed on the door lock: 1. Enter the 4-8 digit Master PIN code followed by the # key 2. Press 7 followed by the # key 3. Press 1 followed by the # key to include the door lock. 3: Check the ISY994i screen and I still see "Listening for Z-Wave Devices to add to the network". I am stumped... Any thoughts on what I can do to get my ISY994i to see my Yale Door Lock again over Z-wave? Advise/assistance appreciated... Pete

