jkmcfadden
Members
-
Joined
-
Last visited
Everything posted by jkmcfadden
-
@sjenkins I just wanted to thank you again for your efforts in getting the DropLet device added. I have it configured in this new production version.
-
I have actually already opened a ticket to upgrade from my current version based on the message in the upgrade instructions. But, even though an older version, it is still supported and should not have caused me any issue. Which it did. This was not how I planned to spend my Saturday. 😒
-
Correct - the first indication was a UD Mobile notification - with an "!" no less. I was quite surprised when I noticed it the next day. I have been using EISY (and ISY before that) for years and have never seen a situation where an upgrade happened automatically.
-
Two nights ago (a Thursday) at 7:59Pm I received a UD mobile notification that my eISY had an "Upgrade in progress!". And 7 minutes later my eISY went off line and never came back. Running the exhaust fans in my bathrooms was the first real indication of an issue - my husband was not pleased. I could not connect to the console and all of my programs stopped working. This morning (Saturday) I struggled to get my eISY back online. I could see that is was connected to my router, but I could not even putty into the box. And after dragging out my monitor and keyboard to connect to my eISY and after several hours of googling, multiple reboots and trying different things, I determined the eISY had lost its internal IP and DNS ability. I eventually tracked down the command to manually reload the IP and DNS . At that point I could "finish" the update I never requested. Which, by the way, left me on the exact same version I was already on (5.8.4 BTW). I thought that upgrades were only requested manually. Which I have avoided but was getting ready to do in the next week or so. But only at my choice of time. Anyone else have something similar happen?
-
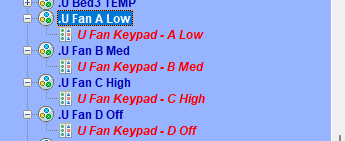
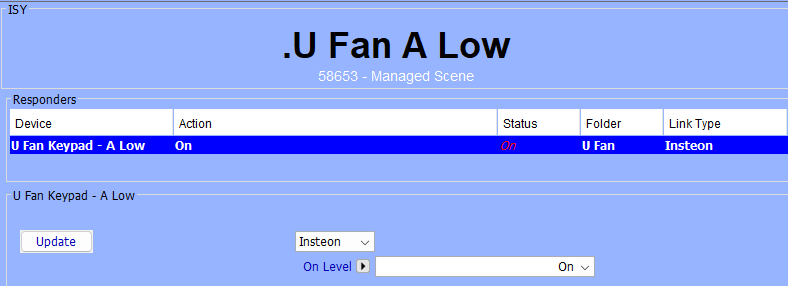
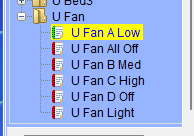
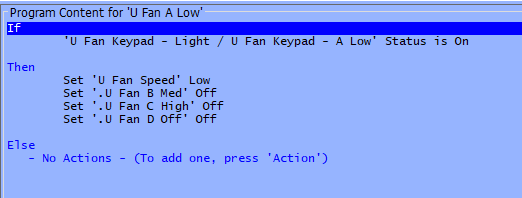
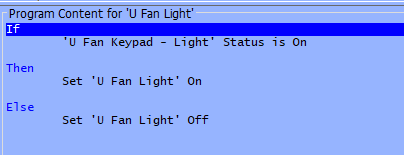
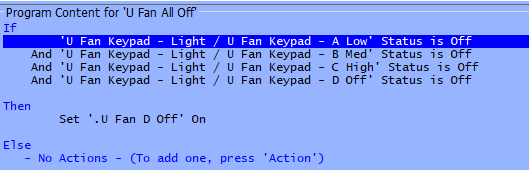
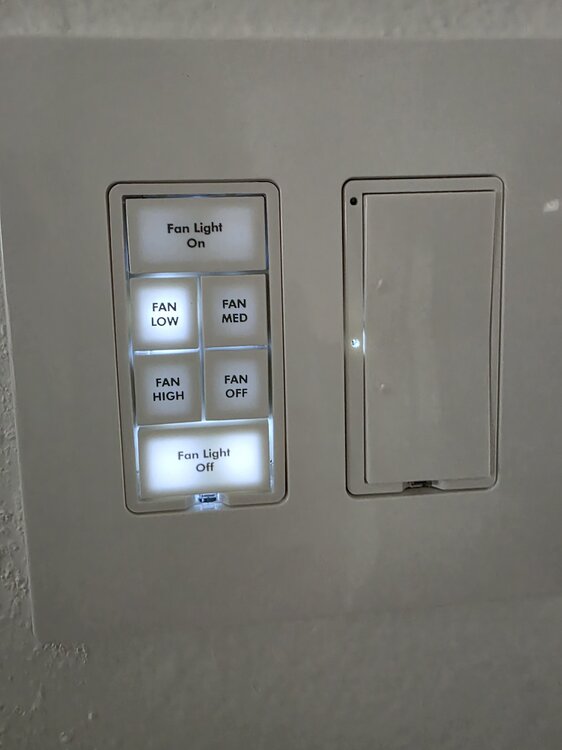
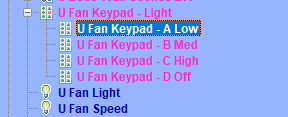
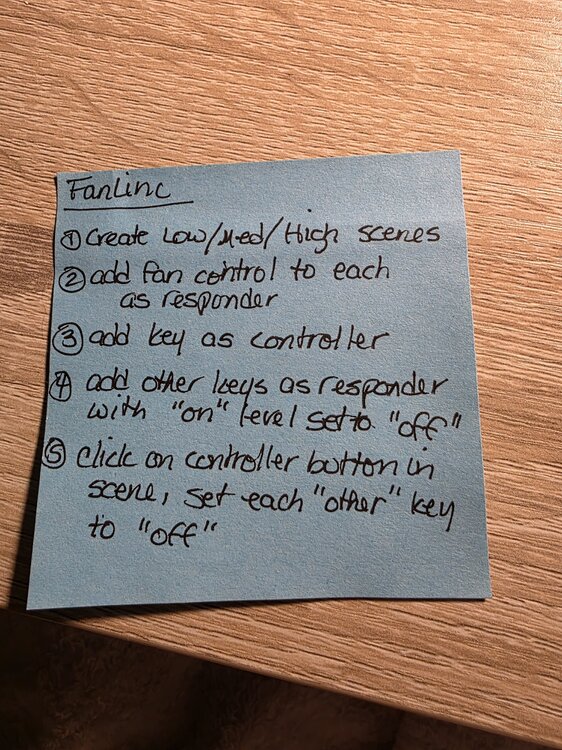
I think everyone has their own favorite setup where Fanlincs are concerned. I have used just scenes but find it confusing because you have to have a scene for every button with every button added. And the individual buttons in each scene have to be set to the correct on/off state. And if one button is set incorrectly somewhere, it is a nightmare to sort out. I personally find this "scene only" setup confusing. So, I use a combination of scenes and programs. The procedure assumes the Fanlinc has permanent power. 1) Create a scene for each of the A/B/C/D buttons where the only item in the scene is the button as a controller 2) Create a program for each fan speed that when a speed button is pressed, it activates the required fan speed and turns off the other button scenes. The result being "radio" buttons that keep all the buttons in sync. 3) Assuming you are using the Fanlinc to also control the light, this light program is just the light button - no scene needed. 4) Finally, I have a "catch all" program for All Off. It activates if you click one of the speed buttons that is already on to off. It activates the Off scene and program. This makes sure that at least one fan speed button is lit at all times. BTW - the use of the OFF scene and programs is optional with this procedure. To turn the fan off, just click to currently lit speed button. Just remove all programs, scenes and references to the OFF setting. Sometimes an extra button is more valuable than a Fan Off key. My keypad. Good Luck! And just for reference, this is the "using scenes only" approach that I used. Each step had to be done for each button. I never use this approach anymore.
-
Thanks and yes, I have factory reset a couple of times as well. Always the same result. In order to use the device to monitor a power input, the 2 and 3 parameters have to be changed. And the directions when changing these parameters to the required values specify to exclude and then include again because the needed child variables do not show up using the default parameter settings. All of this per the Zooz manual. I like Zooz products and have many of their other devices installed. This issue is a first for me.
-
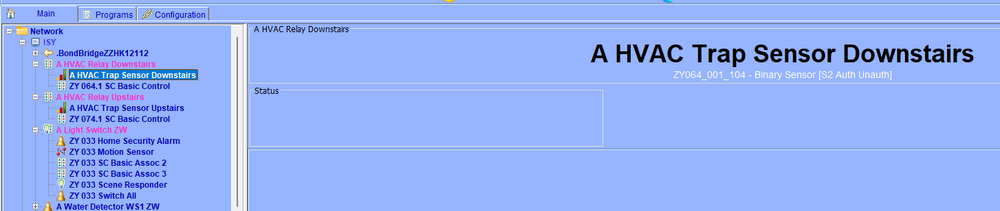
I have installed and configured the Zooz Zwave ZEN17 to monitor the power status of a low voltage line coming from my HVAC p-trap. The purpose being to be able to tell when the p-trap has triggered the unit to turn off. Per instructions, I added the device to my Eisy (version 5.8.4). Once added, per instructions, I set parameters 2 and 3 to 10 and parameters10 and 11 to 0. Then executed an exclude and include again. The unit comes back with the S1 relay containing the expected new child entry. Nothing new for the S2 relay, but that seems to be a known issue with the ZEN17. I then test the new entry with a low voltage transformer and it recognizes the on and off status. But once I power down the ZEN17 and power it back up again, the new child does not work anymore. I can't query it and the on/off status never shows up again. I have tried this with two separate ZeN17 units and the results are the same. I have excluded/included and interviewed many times and nothing seems to solve the issue. At this point, I am going another direction using an Aeotec sensor and an AC current switch. But I would like to know if anyone else seen behavior like this with the ZEN17? Any thoughts or ideas?
-
Manual control is very high on my list. I am just not comfortable with a device deciding when to reboot, I want to make that decision. Something my husband figured out is that our ISP's (Spectrum in one house, Xfinity in the other) both allow you to request a remote router reset via our account login. I have my Hotspot solution in place for one of my homes, but if/when it goes off-line again, we will try the ISP reset before telling my wi-fi plug to cycle.
-
Yes, a little costly, but given the investment we have made in automation, we consider it a good value. It's not just the eISY access, it is also cameras, garage door, smart locks and the like. We are currently away from our second home that went off-line several days ago. Finger's crossed our weekly reboot via our digital timer brings it back on-line. With this new setup I am going to add, I could have likely had it back up without the wait.
-
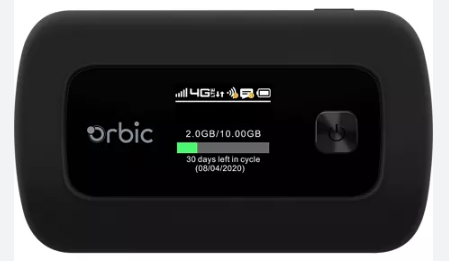
My HotSpot is a separate cellular device that uses the cell towers for wi-fi access. It is not related or dependent on my router at all. I'll keep it in the same closet as my router where the wi-fi plug will be used. So I'll be able to reach the plug when I can't reach my router. And then just tell the plug to turn off and back on again. And yes, the app that works with the plug will work from anywhere.
-
This device won't be dependent on the router wi-fi, but will use the wi-fi from the Verizon hotspot. So I can tell the plug via the plug app to turn off and on to reboot the router but the access to the plug won't be affected since it is on an independant wi-fi network..
-
So, I am going to think outside of the possible eISY solutions (gasp!). I have a spare Verizon HotSpot laying around. I am going to try that with my router plugged into a wi-fi plug connected to the HotSpot. In theory, as long as I have cell service to the location, I can connect in remotely and tell it to reboot. Plugs will be here shortly and I'll give it a try.
-
I also have two homes and inevitably the "remote" one will go offline. But I was hesitant to have the eISY handle the router reboot since it has to talk to the router. My solution is just a plain old digital timer on my router. Mine are scheduled to reboot once a week in the early Sunday AM. My current "remote" house went offline a few days ago. I am patiently waiting for Sunday to roll around.
-
I have mine in the following location - which I believe is the default location when you login.
-
I am not very familiar with Z-Wave long range, but when I first added Z-Wave to my Insteon mix I had to use repeaters to get to more remote devices. As I have added more and more Z-Wave, the need has lessened.
-
Most routers allow you to "reserve" an IP within the DHCP range for a specific MAC. That way it cannot get reused. It seems like more and more devices don't allow the setting of a fixed IP (newer Foscam cameras for instance). But by adding it to the reserved list (once it has grabbed an IP), you can be guaranteed it won't get usurped by another device. IP reservation is usually somewhere deep in your advanced settings.
-
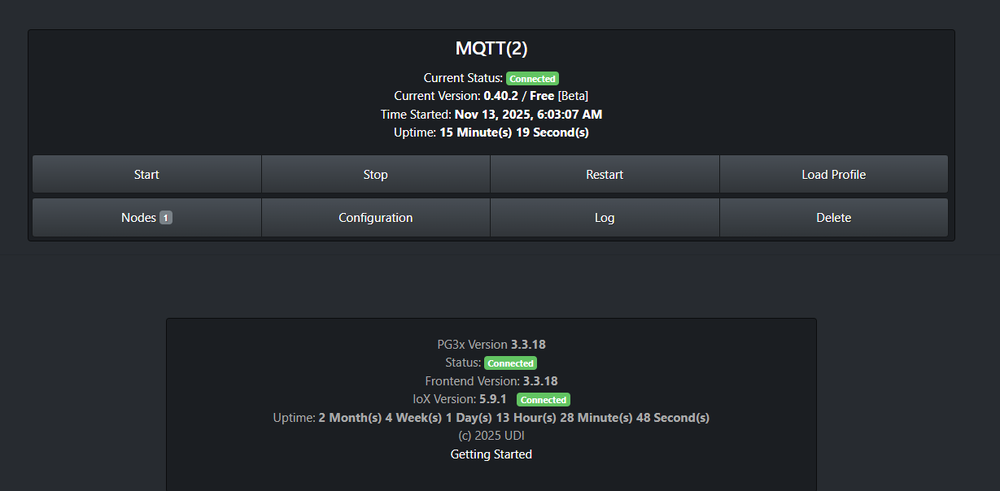
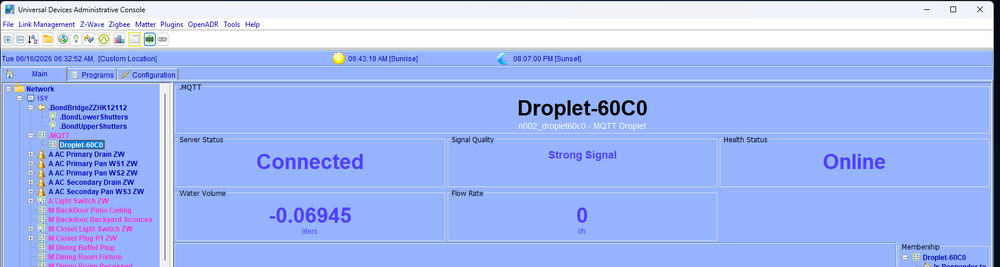
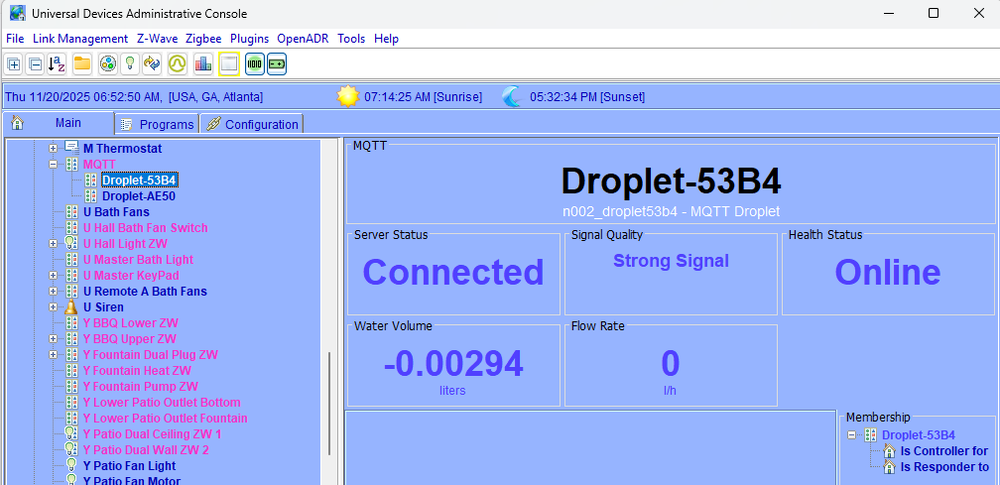
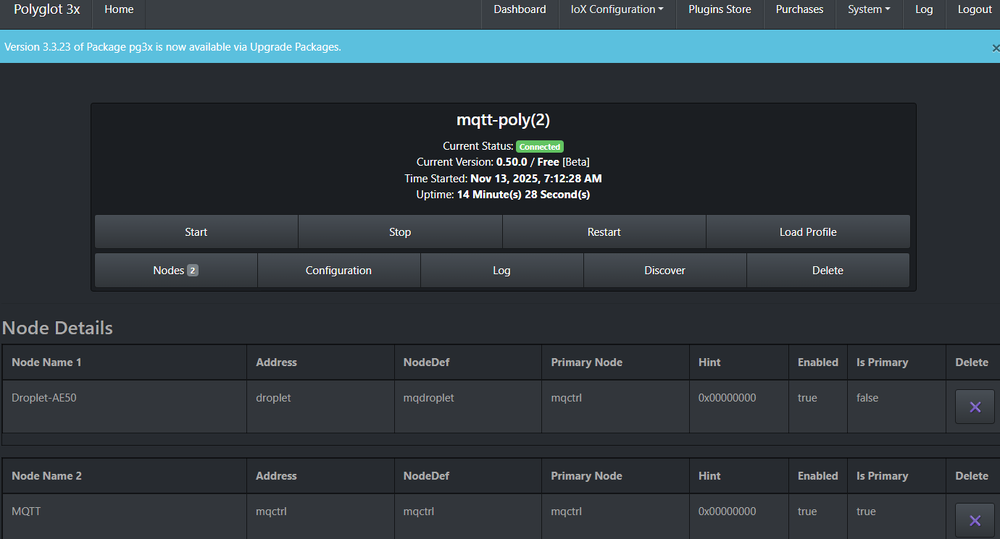
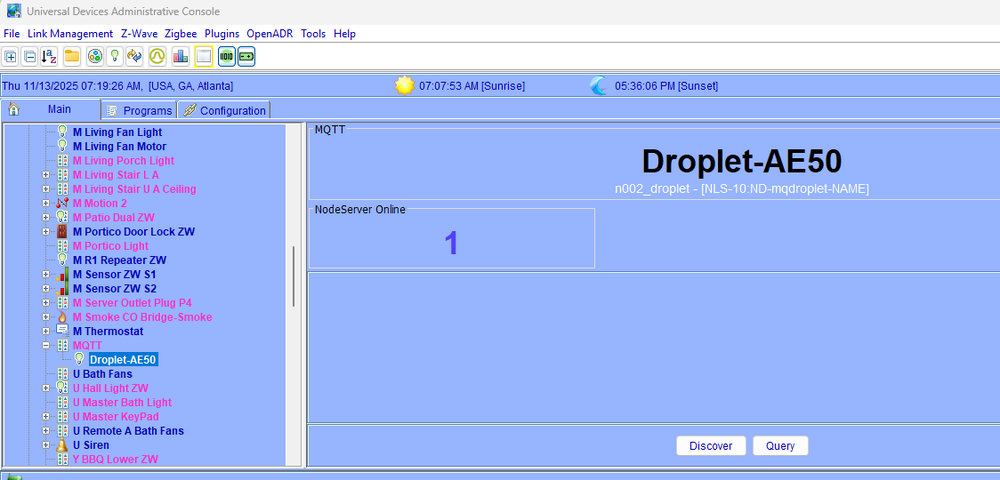
@sjenkins So my second droplet arrived and has been successfully added to MQTT. Thank you for all you help! Once you have moved it into your production MQTT release, I'll re-add everything. But for now, everything looks good with beta. For anyone looking to add this device, here is what I did. 1) In the Droplet phone app -> Smart Home Integrations -> MQTT, configure: Host Name : the local IP address of my EISY Port Number: of my MQTT interface (I used 1884) User name and password of your EISY All other fields blank 2) I added my .yaml file name in the MQTT configuration entry 3) I added the below entries in my .yaml file (I have two droplets). The status and cmd topic entries are the unique value displayed in the phone app, type: must be "droplet", id: and name: are what I chose. devices: - id: "DropletAE50" name: "Droplet-AE50" type: "droplet" status_topic: "droplet-AE50" cmd_topic: "droplet-AE50" - id: "Droplet53B4" name: "Droplet-53B4" type: "droplet" status_topic: "droplet-53B4" cmd_topic: "droplet-53B4" Once I restart my MQTT to pick up the entries, this is what I see in the console: I created a test program to notify on flow and that worked as well. Kelly

-
@sjenkins Ends up I was just not patience enough. I am getting the offline status - it appears 3-4 minutes after I disconnect the device. I can live with that. So, what I am still wanting to test is adding the second Droplet. I ordered it late last week so hopefully I get it sometime this week so I can test that. I'll keep you posted. Thanks!
-
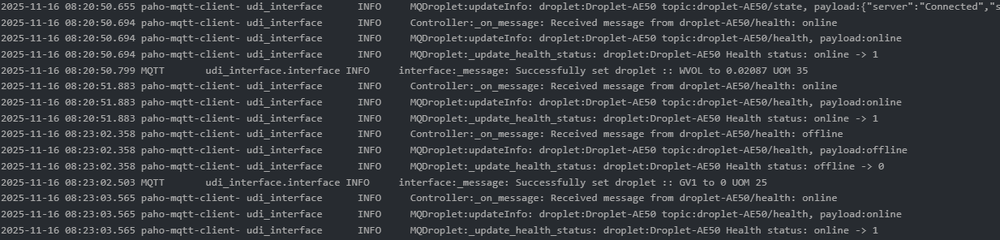
@sjenkins observation and question I have been playing around with the online/offline status. What I notice is that if I unplug the Droplet, the status messages just stop and the status in the console remains as the last status received which was online. The Droplet App on my phone does recognize that the device is offline. Then, when I plug it back in a few minutes later an "offline" message does appear followed immediately by the online status. It looks like the device sends a stored offline message. Sort of useful, but not really since it is very transient. Below I unplugged at 8:20 and plugged back in at 8:23 - and that is when the "offline" message appears followed immediately by the online message. I assume the App has some additional handling of the device to recognize that it has gone offline. And the limitations of MQTT are different. And I understand that. But I do think it would be useful to know when the device is not responding. So, I am wondering if it is possible to add another parameter to the device data to include the date/time of the most recent message. With that I could at least create a notification program if the last date/time exceeds a certain time limit. Is that doable? Or is there a way for the interface to recognize if a device is not "sending"?
-
@sjenkins My testing is going well. This is the yaml I am currently using. devices: - id: "Droplet" name: "Droplet-AE50" type: "droplet" status_topic: "droplet-AE50" cmd_topic: "droplet-AE50" Couple of questions: 1) I have a second droplet on order. How would the entry of the second one look? Sould all the values be different except the "type". For instance: devices: - id: "Droplet2" name: "Droplet-XX00" type: "droplet" status_topic: "droplet-XX00" cmd_topic: "droplet-XX00" I sort of remember I tried using the following in my original configuration and it did not work with anything except "Droplet" as the "id:" - sorry I don't have the exact log messages anymore, I just know I had to change the "id:" to "Droplet" to get it to work. I sort of remember a message about "DropletH" not found (or something like that). devices: - id: "DropletH" name: "Droplet-AE50" type: "droplet" status_topic: "droplet-AE50" cmd_topic: "droplet-AE50" 2) To then add the new "Droplet", once I update the yaml, do I just restart MQTT in the PolyGlot dashboard to get it to appear in the Console? Or is there a cleaner way? Again - thanks for your patience with me while I learn this new interface. Kelly
-
@sjenkins Just created and ran a test program to alert me when the flow exceeds a certain level. Works like a charm! It is exactly what I wanted to do with this device. Basically to get notified on flow when there should not be - AKA a "leak". Thanks for your patience with me, your hard work and quick turn-around. Kelly
-
@sjenkins WooHoo!

-
@sjenkins Some progress Here is my yaml entry: devices: - id: "Droplet" name: "Droplet-AE50" type: "droplet" status_topic: "droplet-AE50" cmd_topic: "droplet-AE50" But still not getting the fully configured entry in the admin console. I can see the health and state calls and replies. Log attached. Unfortunately, I have to go to my day job - so replies might be sporadic. To be honest, this is way more fun but I gotta pay the bills 😉 debug2.txt
-
@sjenkins I was hoping it was something stupid like that - the one I had said "beta" so I assumed it was correct. I am re-installing now. Thanks!
-
Hi @sjenkins and @TriLife I have installed the beta MQTT and updated to the settings listed above. FYI - I did delete the production version of MQTT since I have no other MQTT devices and I wanted to make sure I was using the correct version. Here is my yaml file: devices: - id: "DropletH" type: "droplet" status_topic: "droplet-AE50" cmd_topic: "droplet-AE50" But I am getting this message in the log file. 2025-11-13 06:03:08.663 Thread-3 (parameterHandler) udi_interface ERROR Controller:discover_nodes: Device type droplet is not yet supported I have attached the full log file that was created after my most recent "restart". Did I maybe miss a step? Would you like me to continue to use this thread - or use the "generic" one you created for the beta release? debug.log